Get Inspired by Joe Average
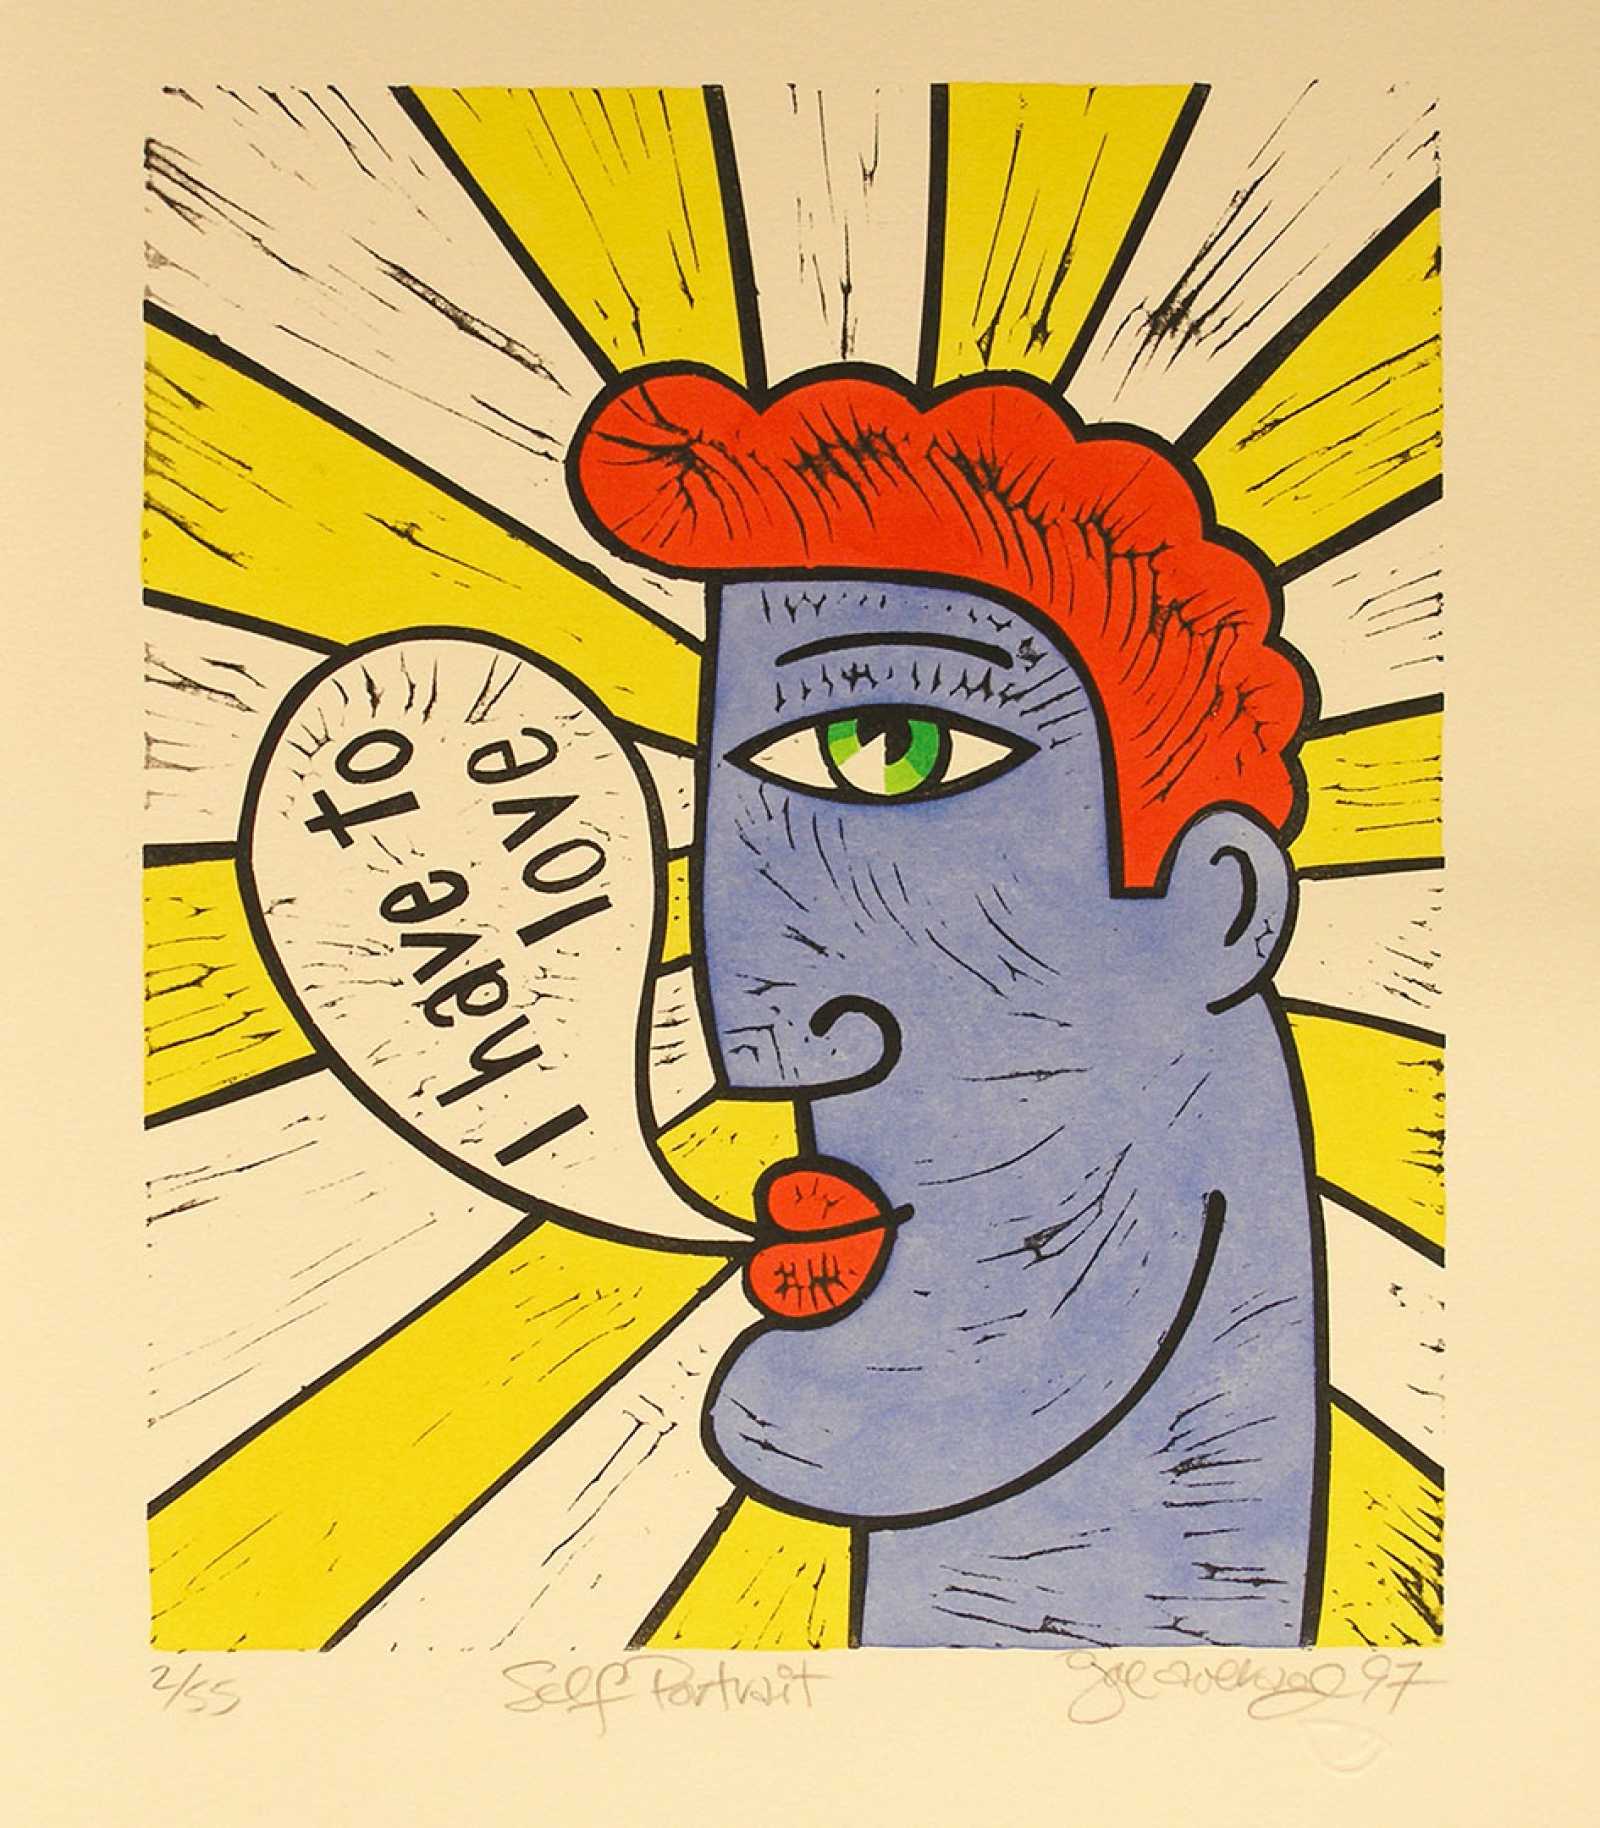
Joe Average (Canadian, born 1957), Self Portrait (from HEARTFELT), 1997, edition 2/55, linocut with hand color, 14 x 12 inches. Gift of Torrie Groening and Stephen Melvin, 102-2006.2.
Learn about printmaking and make a relief print using household items.
Relief printing is a method of printmaking where markings are etched into a printing plate to create recessed grooves. Ink is applied to the plate; paper is placed on top; and then areas of ink on the raised surface are pressed into the paper to make a print.
Find out more about Joe Average, who has made prints throughout his career as a way to communicate his ideas inspired by popular culture imagery.
Supplies:
- Pencil
- Water-based markers
- Flat piece of Styrofoam, such as a plate or takeout container
- Sketch paper
- Drawing paper (paper from your printer does not work as well, but if you do not have drawing paper you could also use another type of thick paper such as a manila folder)
- Scissors
- Damp sponge or paper towel
Instructions

Step 1
Using scissors, cut out a square or rectangle from the Styrofoam that is large enough to draw on. You can use a Styrofoam plate or a takeout container; just make sure you are using a flat piece. This will be your printing plate.
Step 2
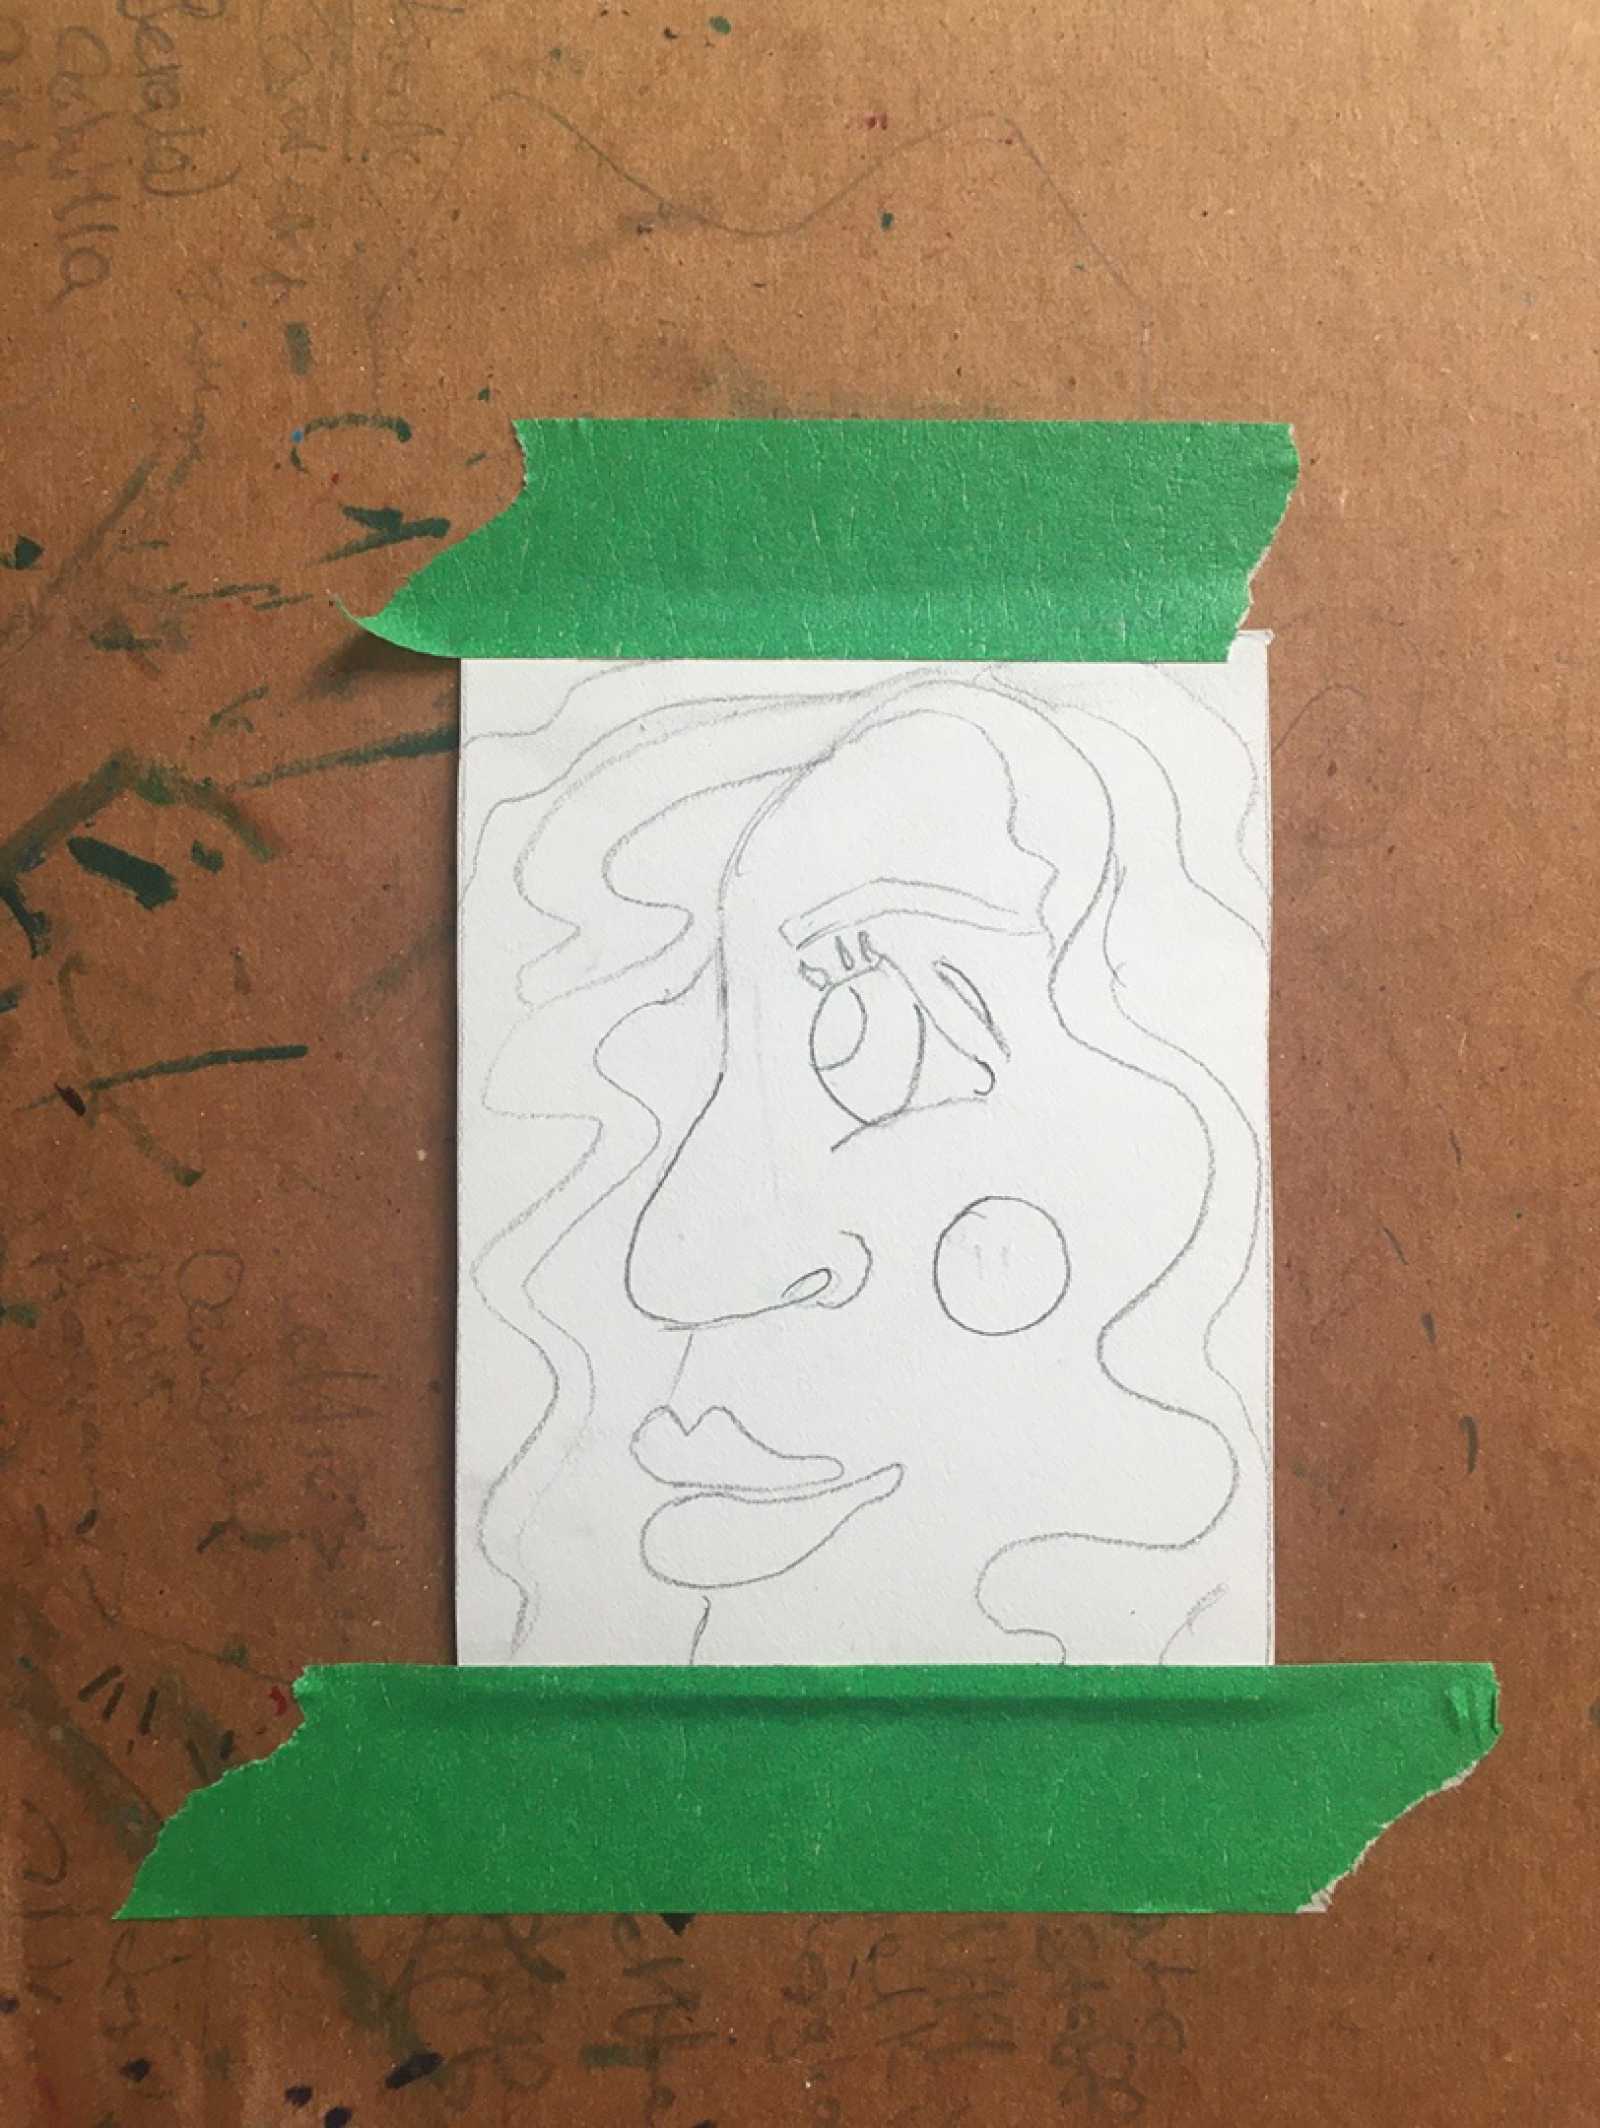
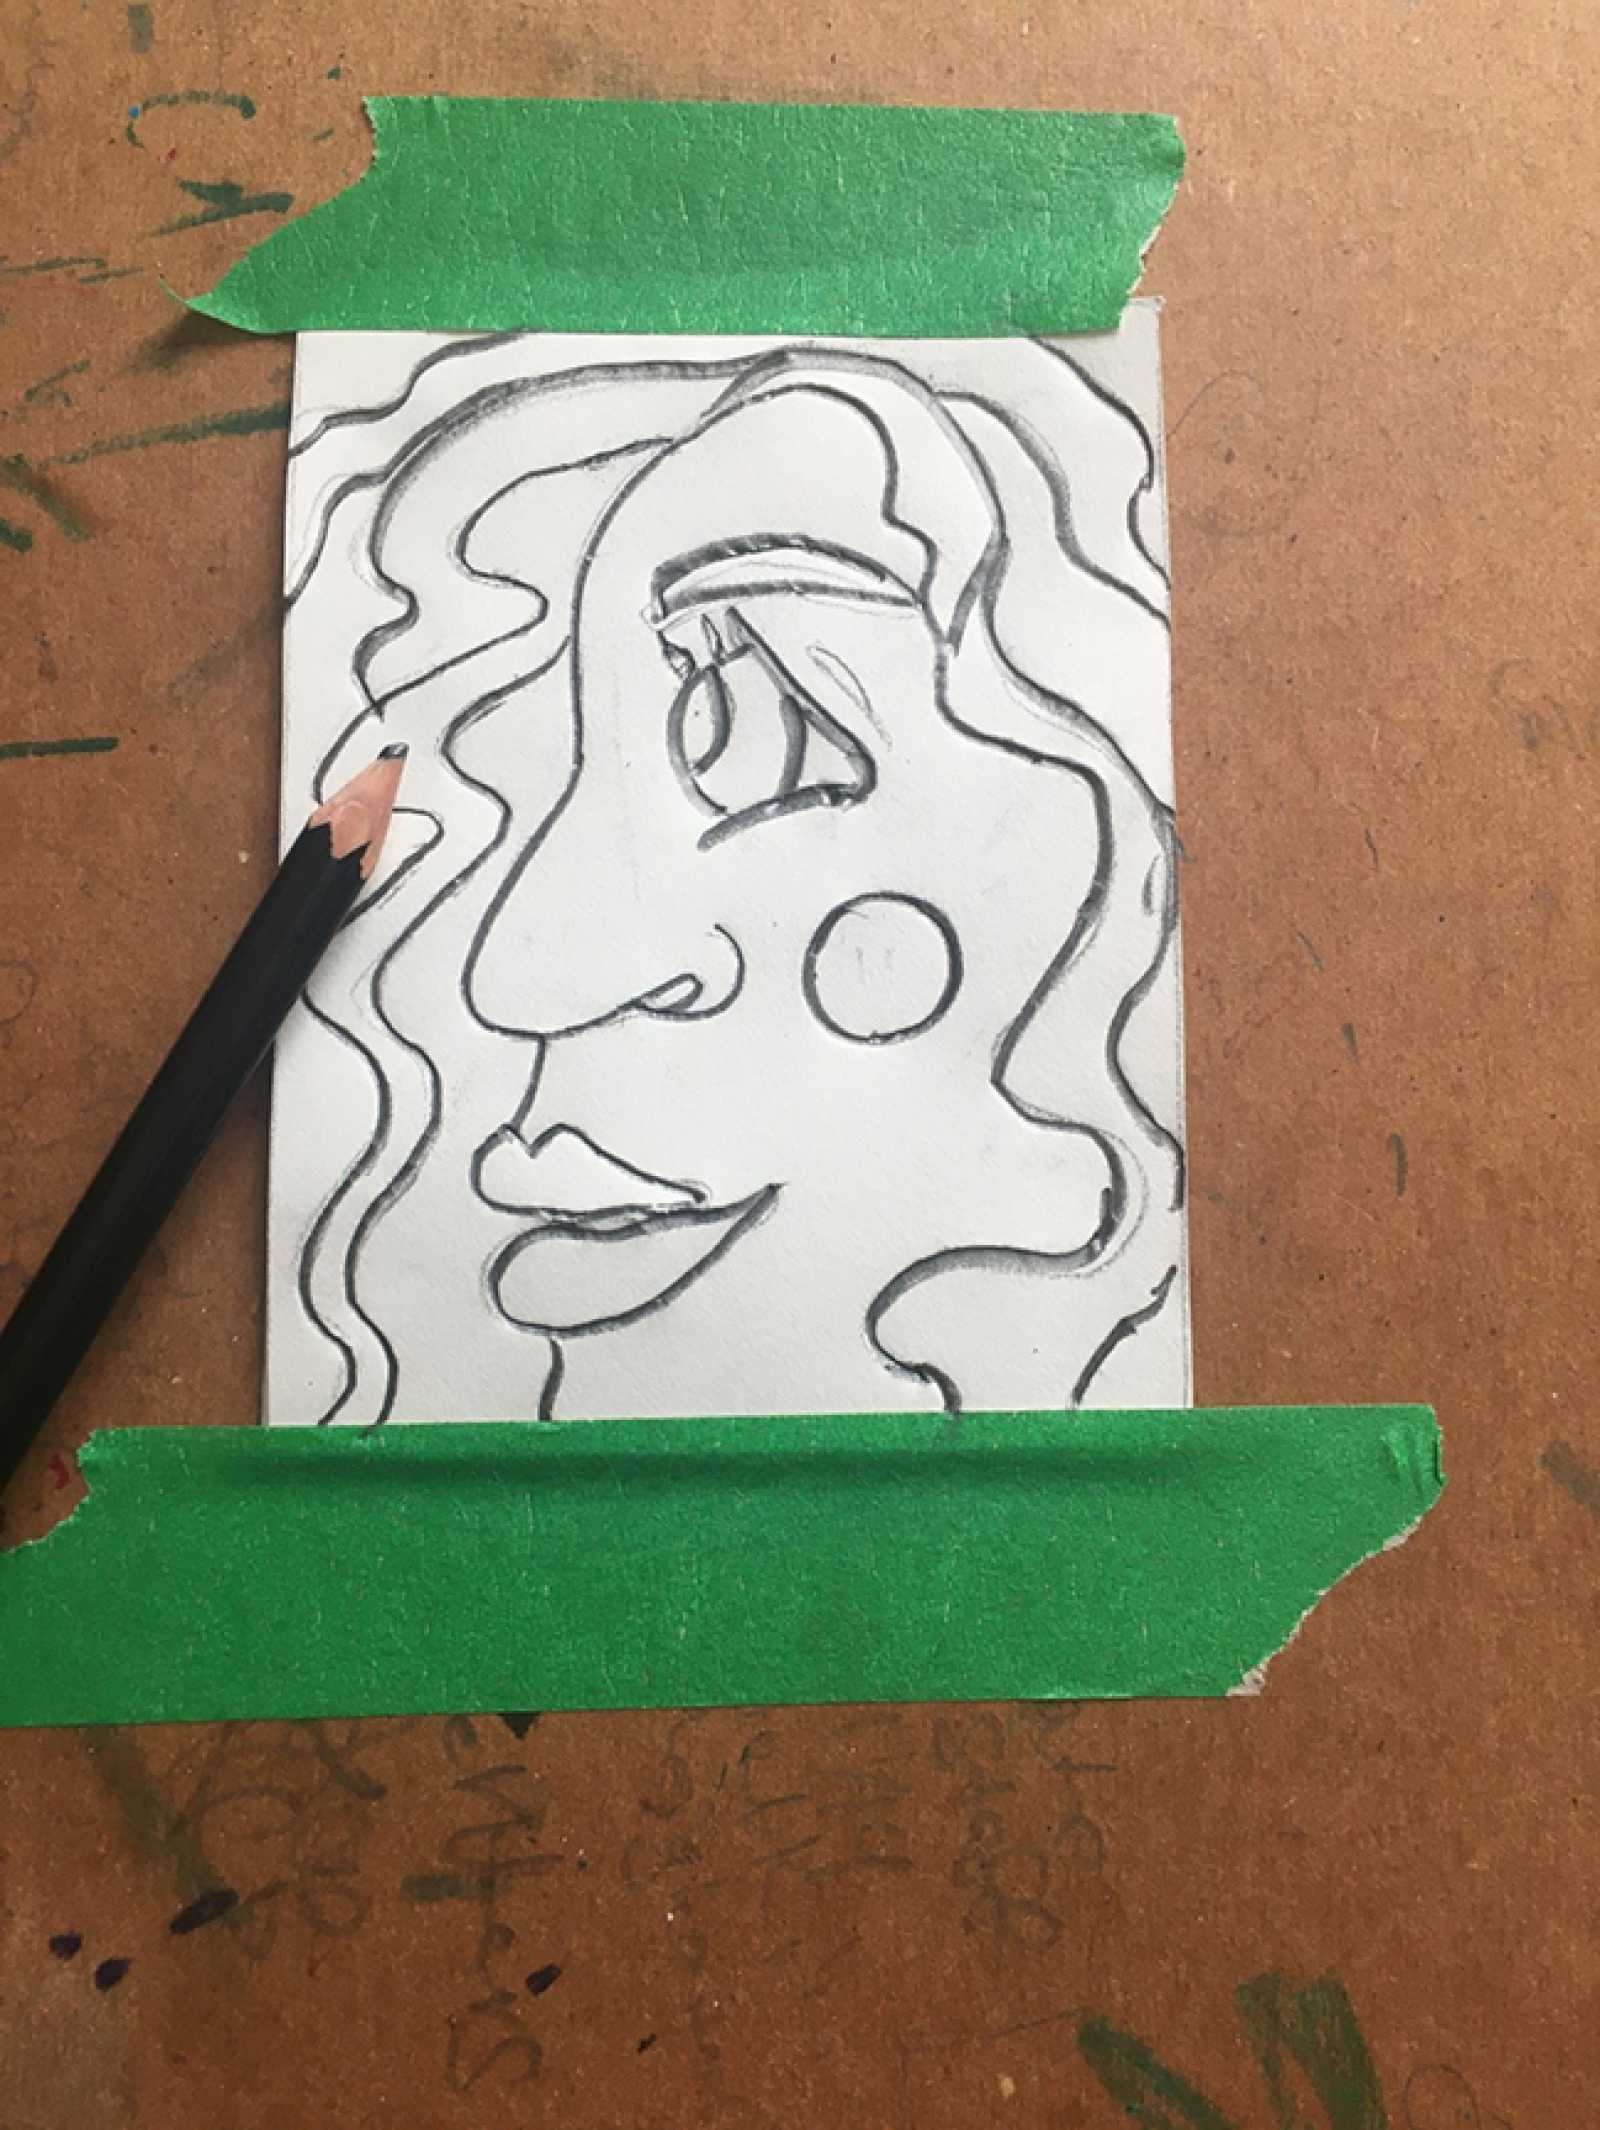
On a piece of sketch paper, practice drawing an image for your print. You might draw a portrait, an abstract design, or another kind of image. You do not need to include a lot of detail, but do concentrate on important features and lines.
Keep in mind the size of your final drawing will need to fit on your printing plate.
Tip: On your drawing paper, trace around the Styrofoam cutout with a pencil so you know what size your drawing can be.
Step 3
Cut your final drawing paper to match the size of your printing plate and then place it on top.
Tip: So that the paper does not move as you trace your drawing onto your print plate, you can cut out your sketch paper larger than your plate so you have space around the edges to lightly tape the top and bottom of your drawing to your table. That way, the drawing stays in place as you transfer the image to the Styrofoam plate.
With a medium sharp pencil, firmly press down and trace over your drawing lines so that you leave impression marks on your plate. Be careful not to press too hard or you will tear through the paper. Lift your paper to check on your impression. It should look similar to your drawing, but with recessed grooves and indents.
Remove the paper from the top of your plate. Now you are ready to make a print!

Step 4
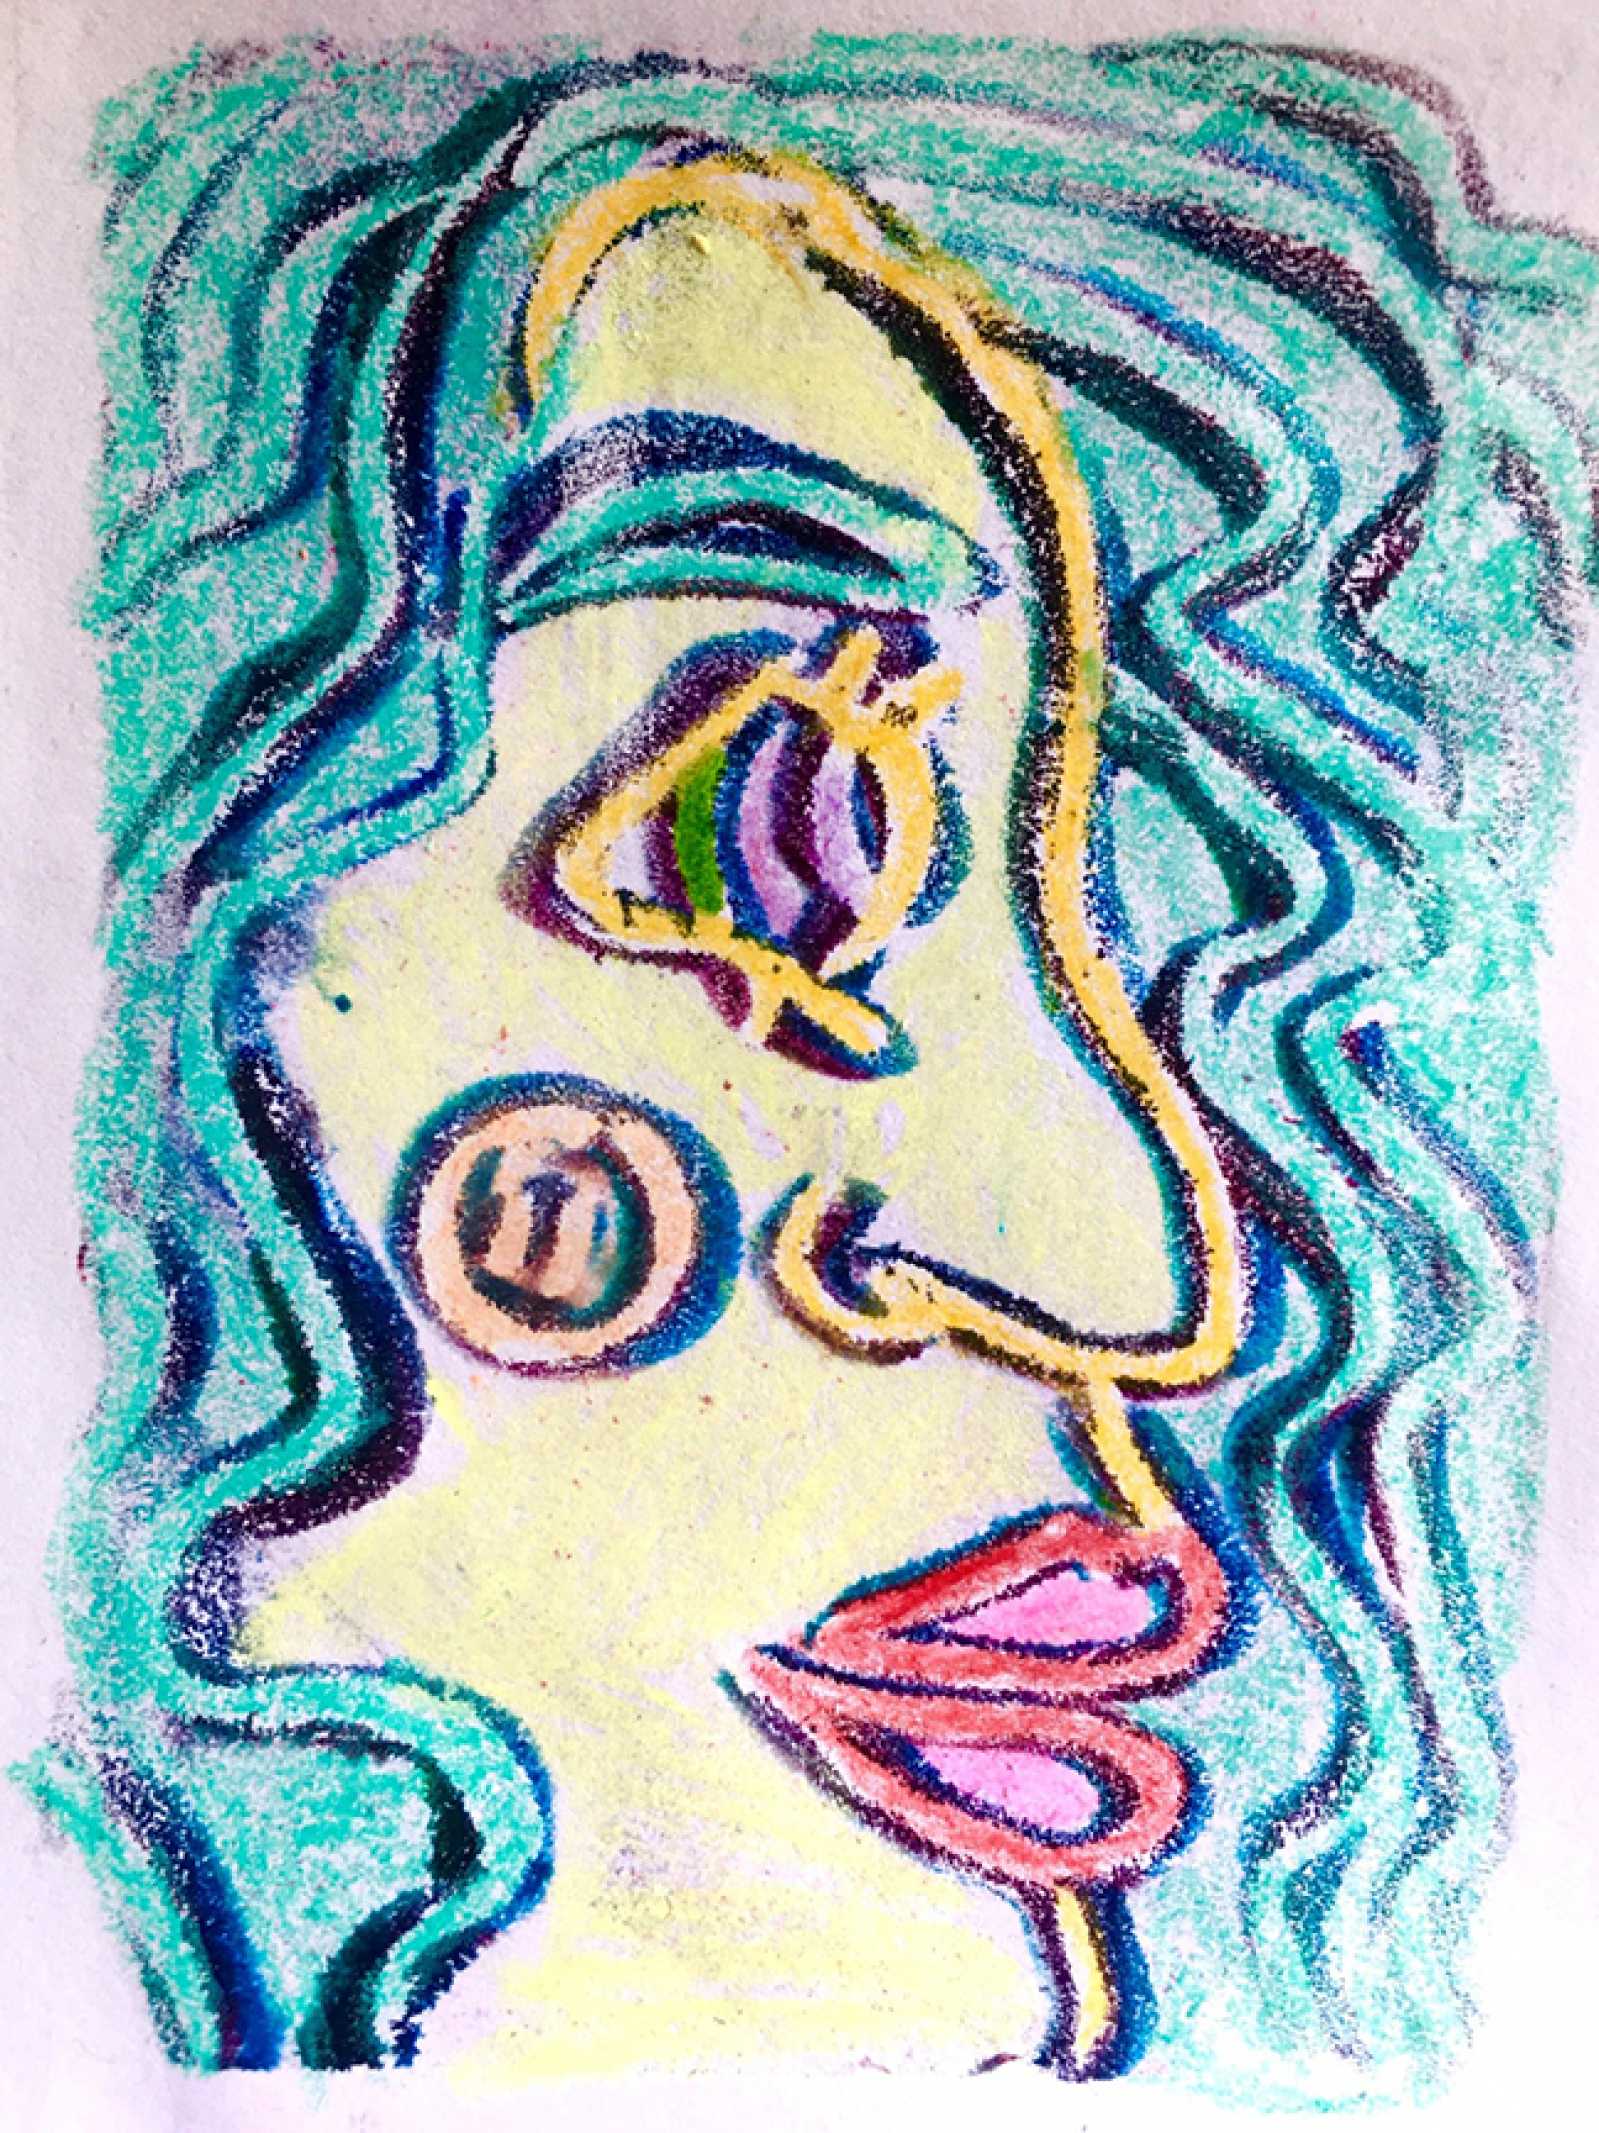
Choose one or two water-based markers and then color your Styrofoam plate. Try to work quickly so that the ink does not dry out on the plate.
The artist Joe Average added colors by hand after making a print. You might consider leaving sections of your plate without ink so you can add color and details after you make a print.
Step 5
On a new piece of drawing paper, run a slightly damp sponge or paper towel across the surface. This will help to wet the ink on your plate when it comes into contact with your paper.
Place your paper on top of your printing plate, and then run your hand across the surface so that all areas of the plate come into contact with your paper.
Slowly peel back the paper to reveal your print.
A great thing about printmaking is that you can reproduce your image over and over again. Clean off your plate with water and a sponge, and then keep practicing your printmaking techniques, trying out different colors.