Get Inspired by Yaacov Agam
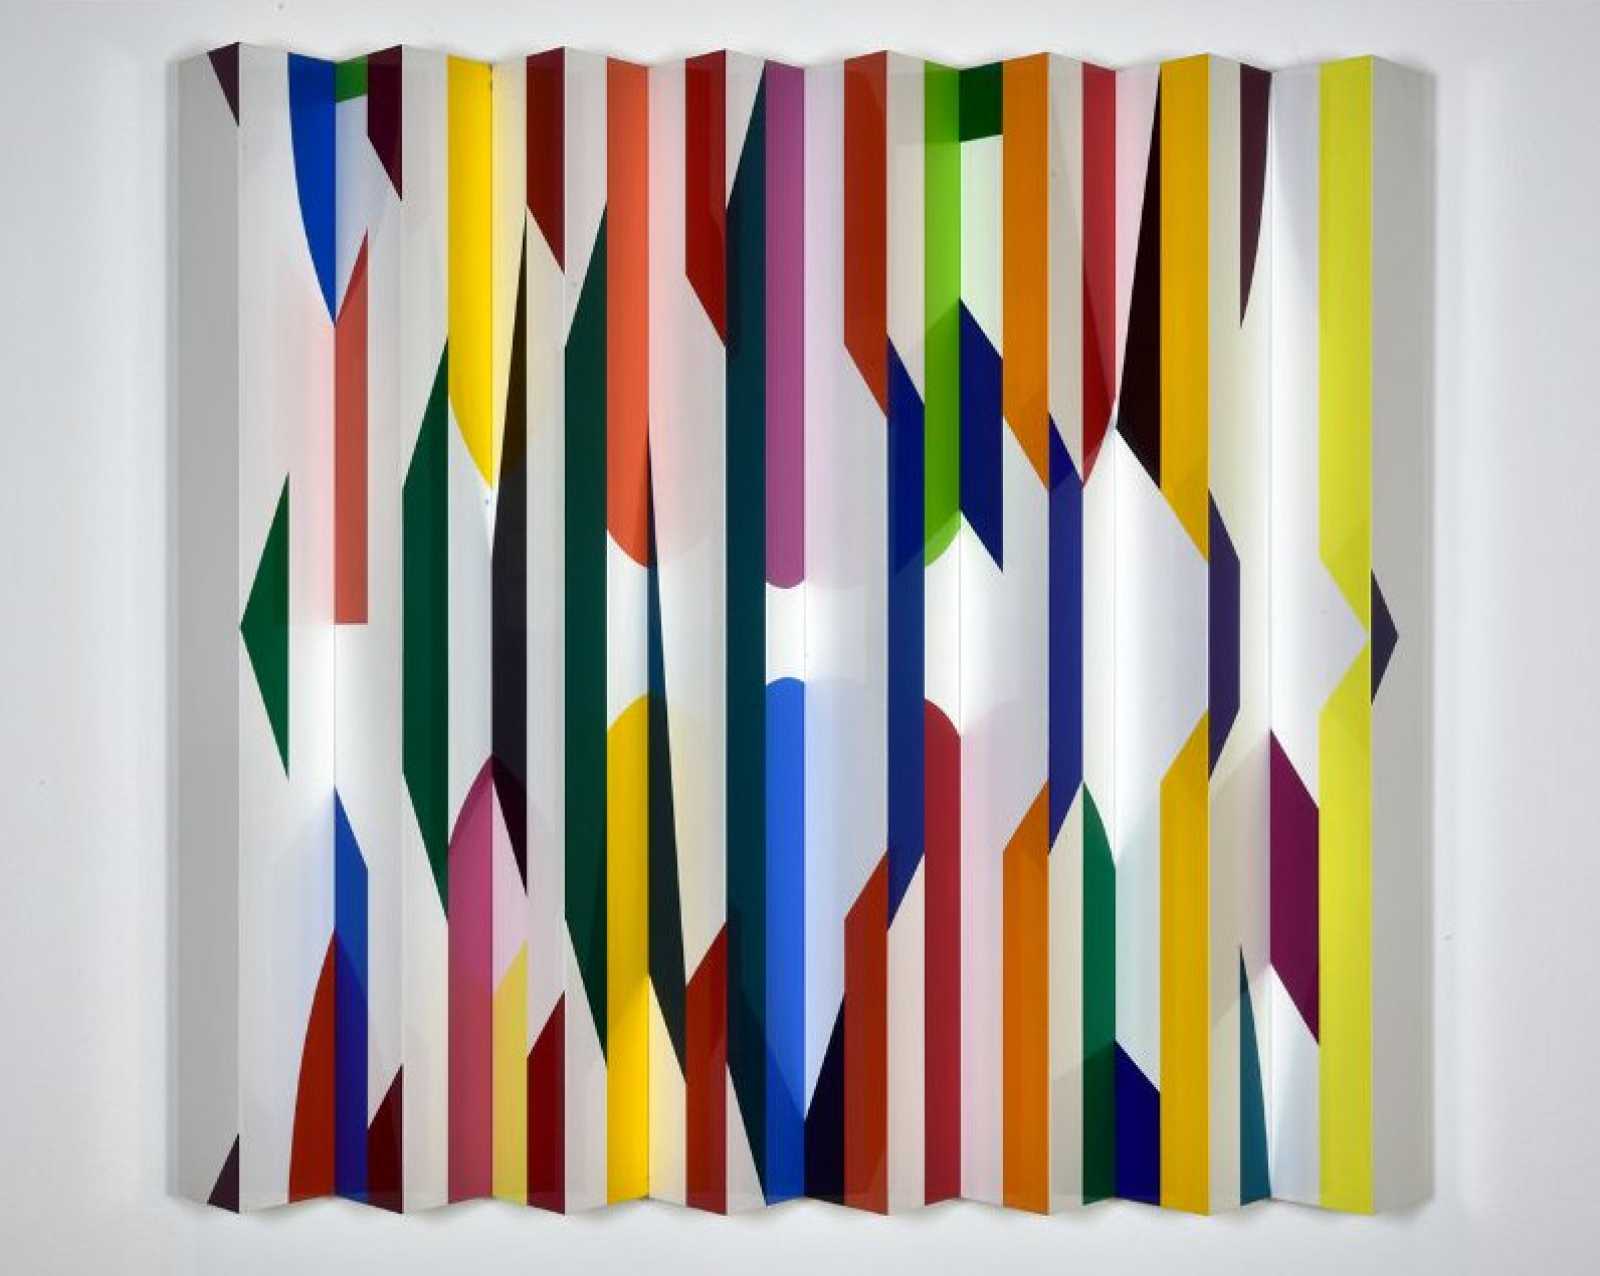
front view
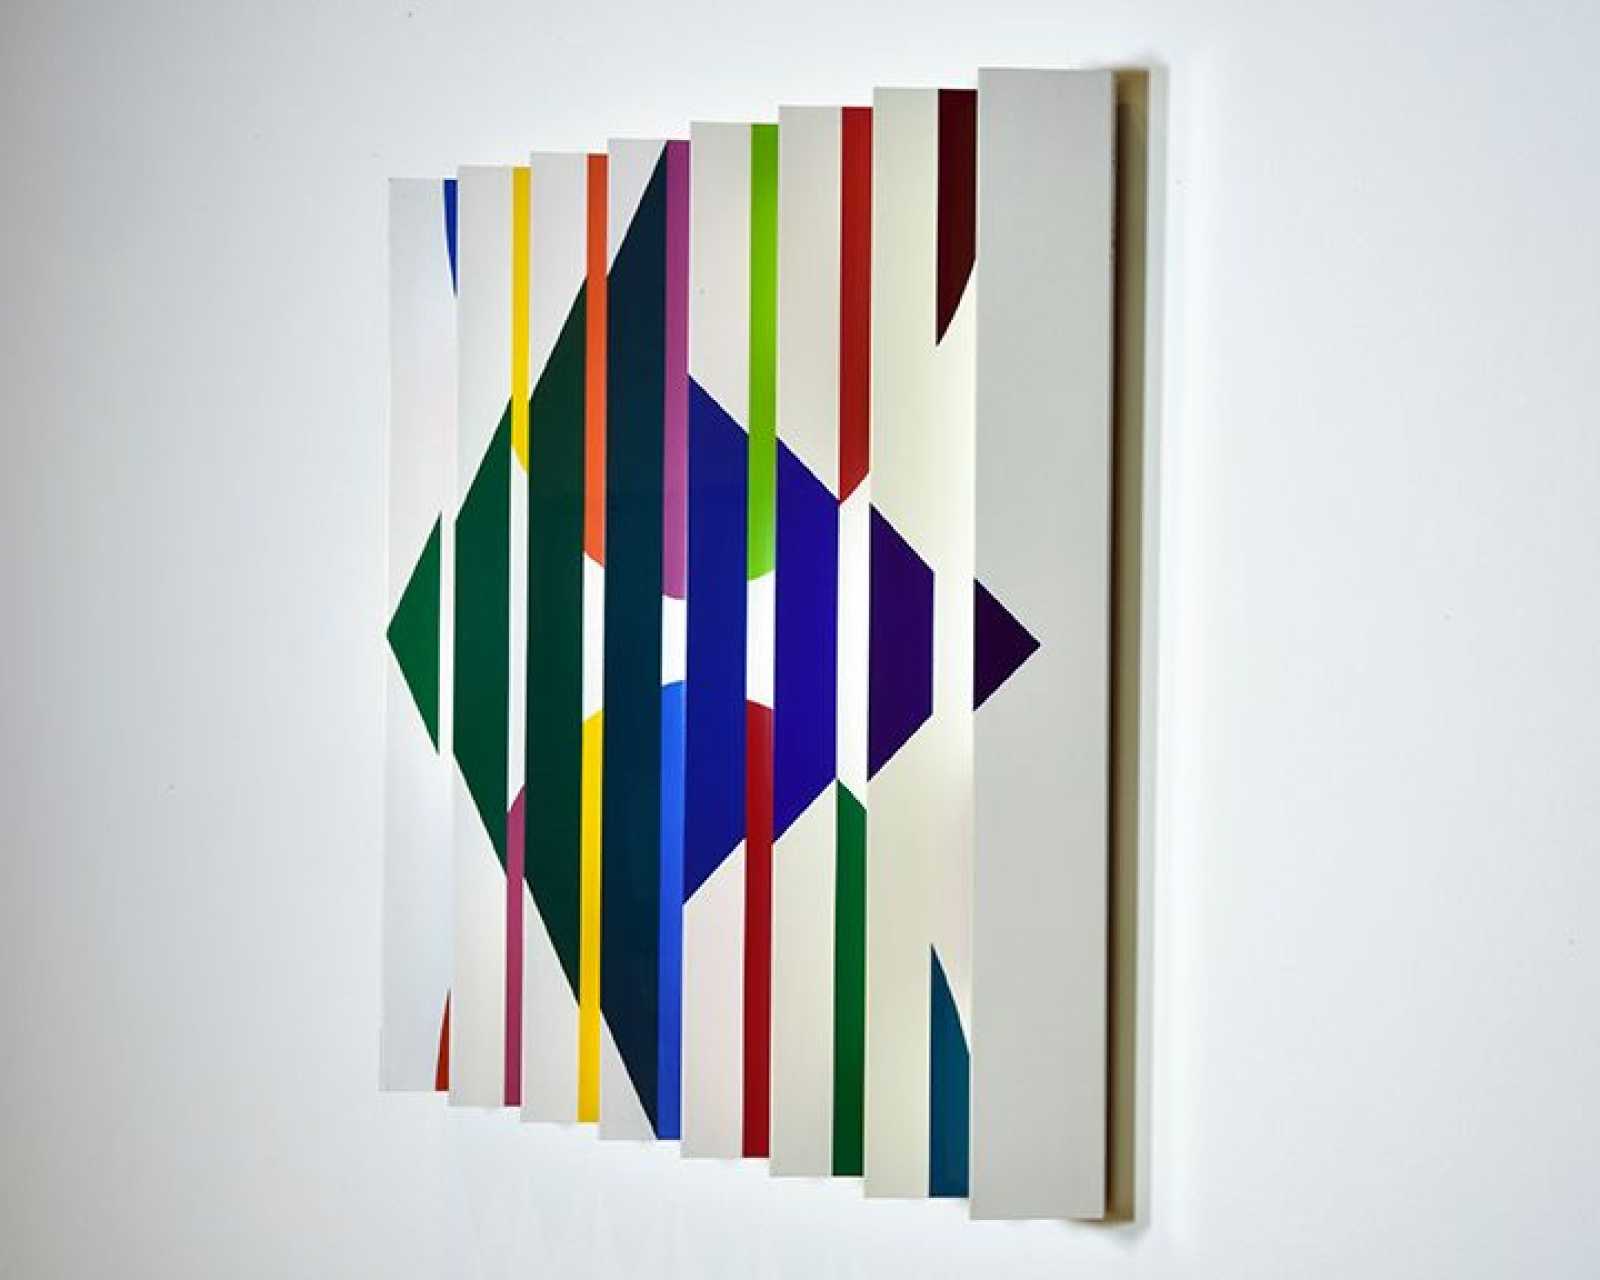
left view
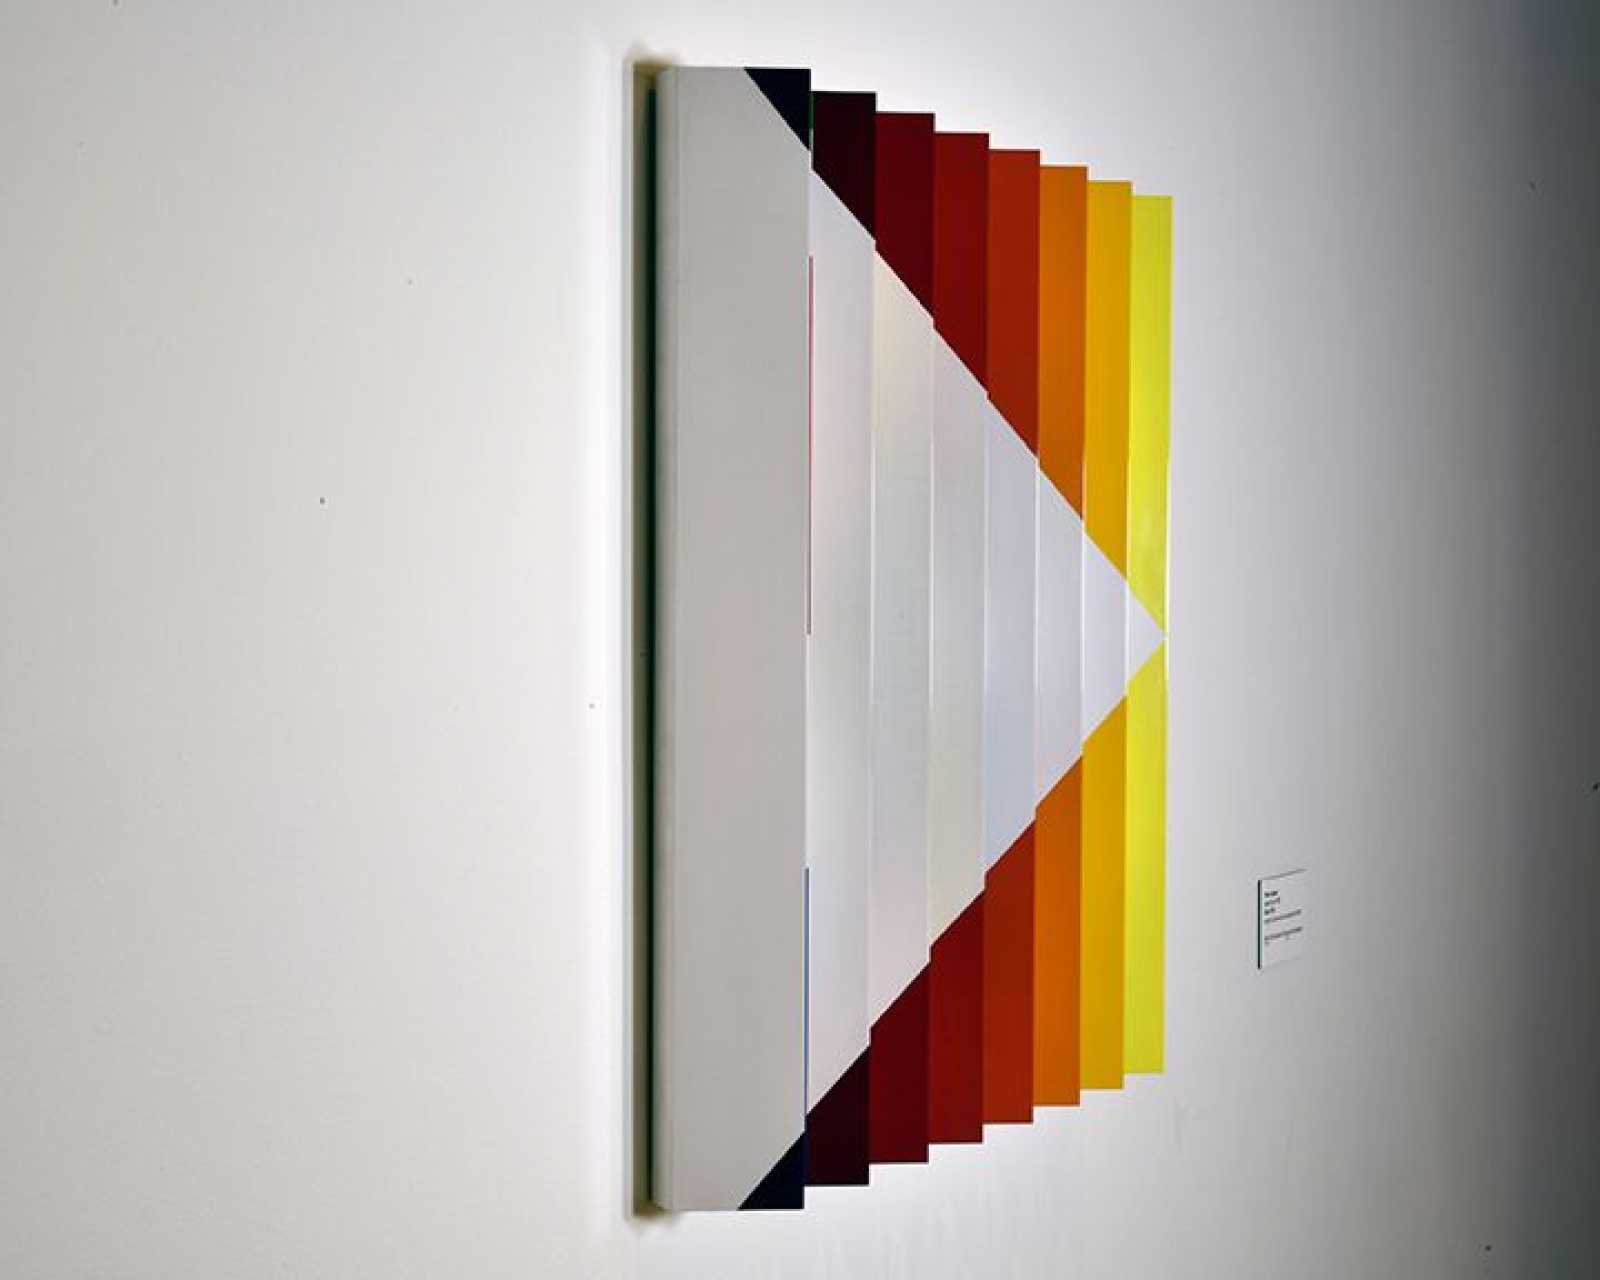
right view
Yaacov Agam (Israeli, born 1928), Paris, 1980, acrylic on aluminum mounted on board; 30 1/8 × 33 1/4 × 4 inches (Frame, white acrylic and plywood mounting board: 38 × 41 × 1 inch). Gift of the Estate of Gladys M. Rubinstein, 2014.101a-b.
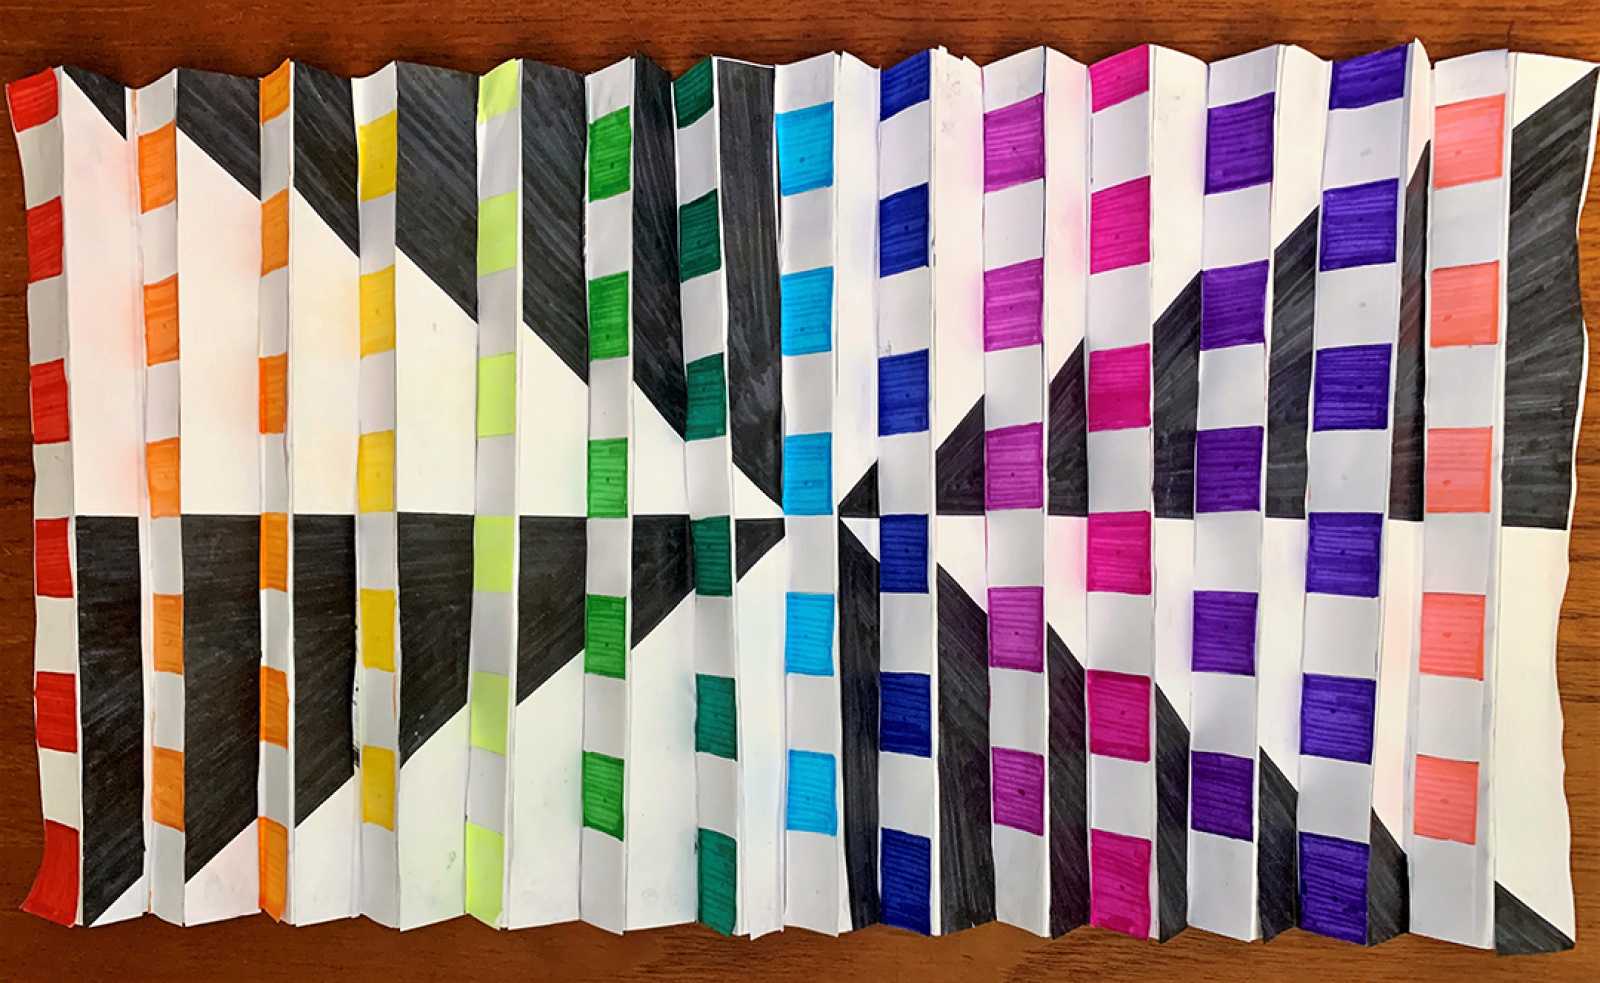
Agamographs
Make your own Agamograph inspired by the work of artist Yaacov Agam. Learn about Op Art and Kinetic Art and create the illusion of movement through a three-dimensional relief.
What is Op Art?
Op Art is short for Optical Art—and refers to the way we see. Artists use shapes, colors and patterns to create illusions—something that appears different than what it is. Op Art typically utilizes geometric shapes and contrasting colors to challenge visual perception, either with hidden images or by making things appear as if they in motion.
What is Kinetic Art?
Kinetic Art involves motion. Some artists create works that operate mechanically or move with air currents, while others encourage viewers to move in different positions to experience the full visual effect of their work.
Learn more about Yaacov Agam here
Supplies:
- Pencil
- Coloring tools of your choice (markers, pencils, crayons, paints, etc.)
- Four pieces of white 8.5 x 11 paper (or two sheets of paper the same size and one larger that is the same length as the two combined)
- Ruler
- Glue
- Tape
- Scissors
Instructions
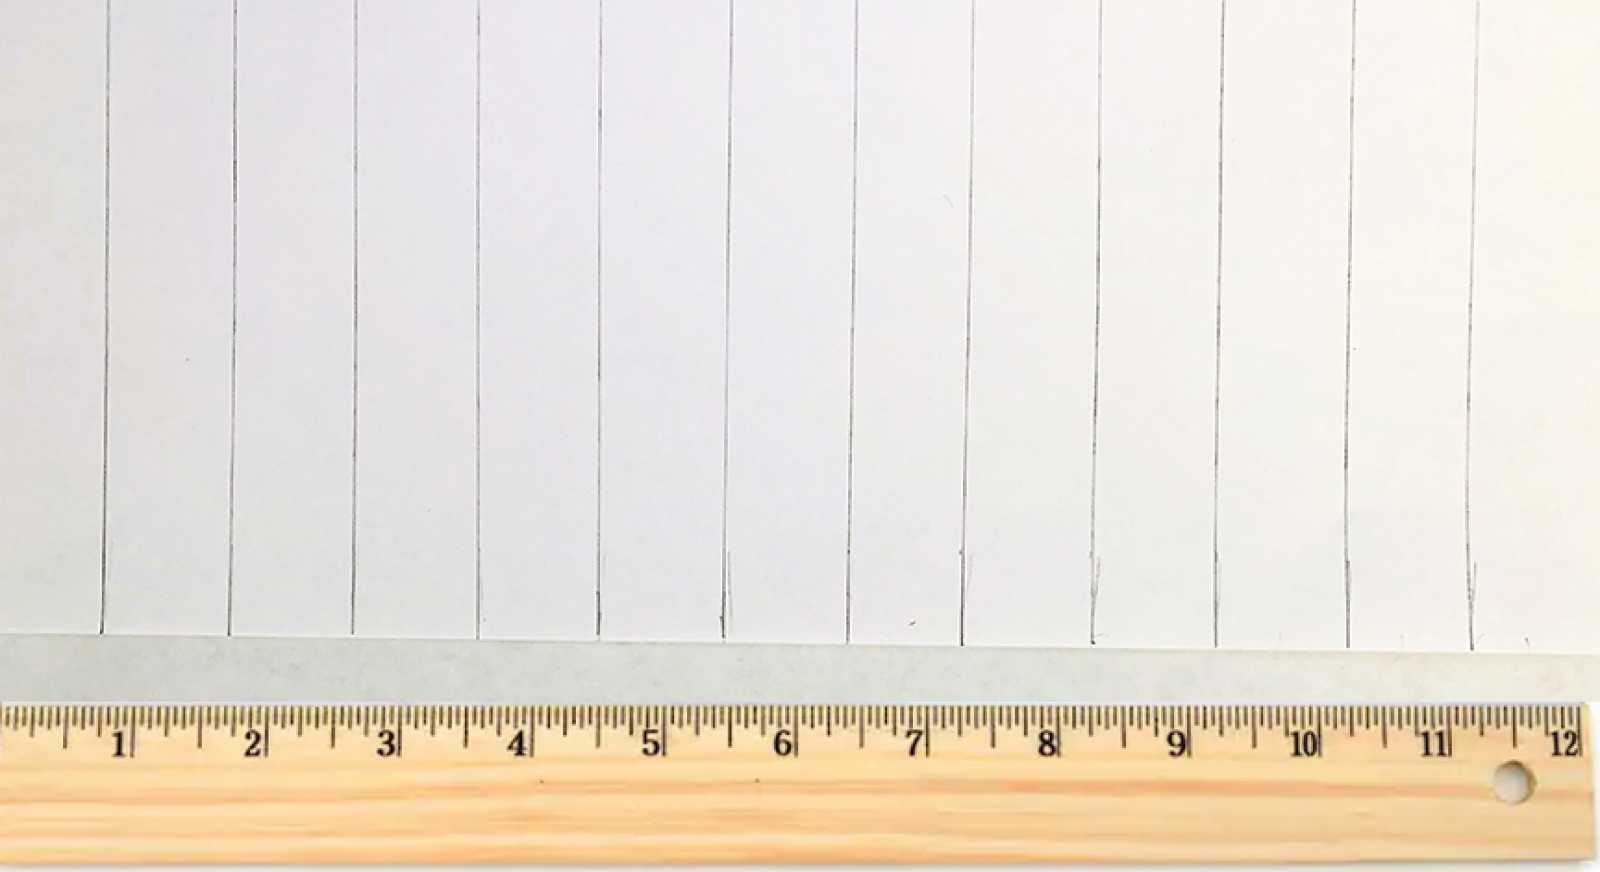
Step 1
Using two sheets of 8.5 x 11 white paper and a pencil, evenly measure and mark lines at the top and bottom of the long edge of the paper (horizontally). Connect the top and bottom marks with a ruler to create guidelines for folding.
Step 2
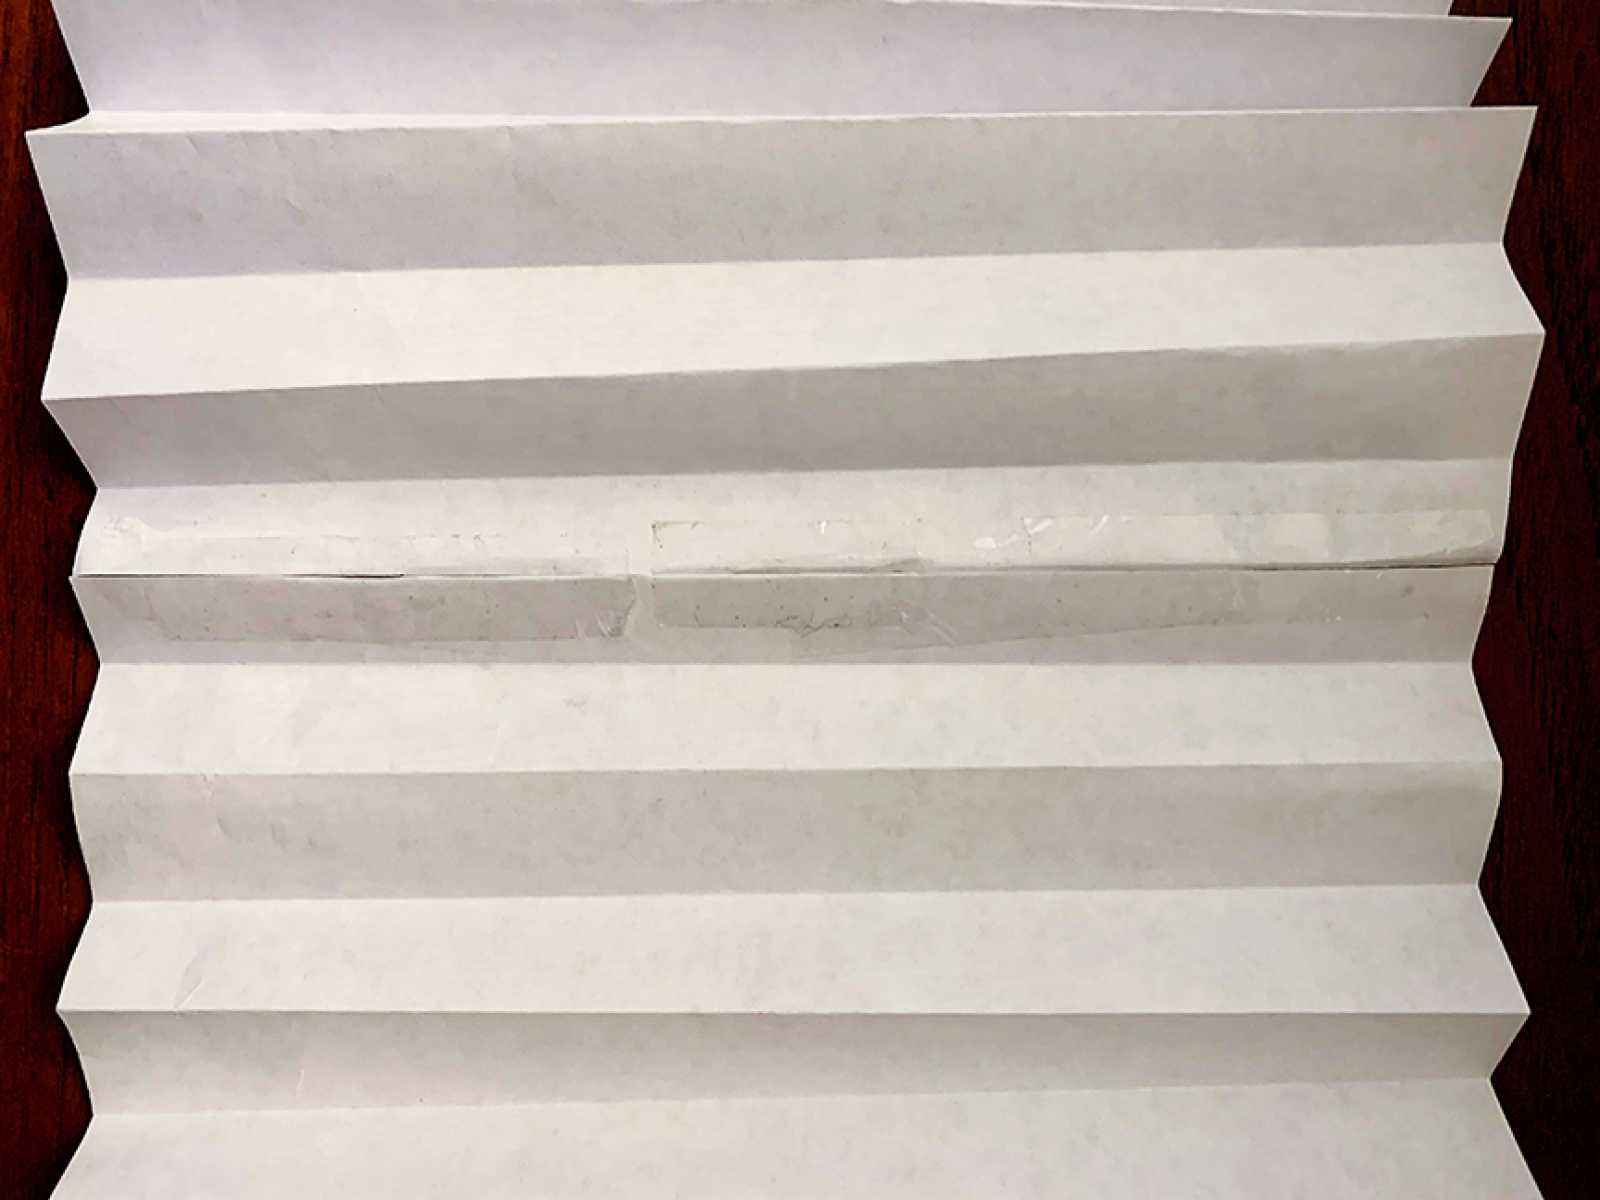
Fold each sheet of paper along the lines in a fan or accordion fold; fold back and forth across the length of the paper so it stacks on top of itself.
Tip: Fold along the lines first to create a crease, then go back and fold in the opposite direction, like a fan.
Unfold both folded papers and lay them on a flat surface.
Join the two sheets to create one large paper by aligning the two pages at the edges and taping the seams.
Tip: Do not allow any gaps between the papers. You can also tape the last fold of each paper one on top of the other; just keep in mind this will be one less fold when drawing and assembling your Agamograph.
Step 3
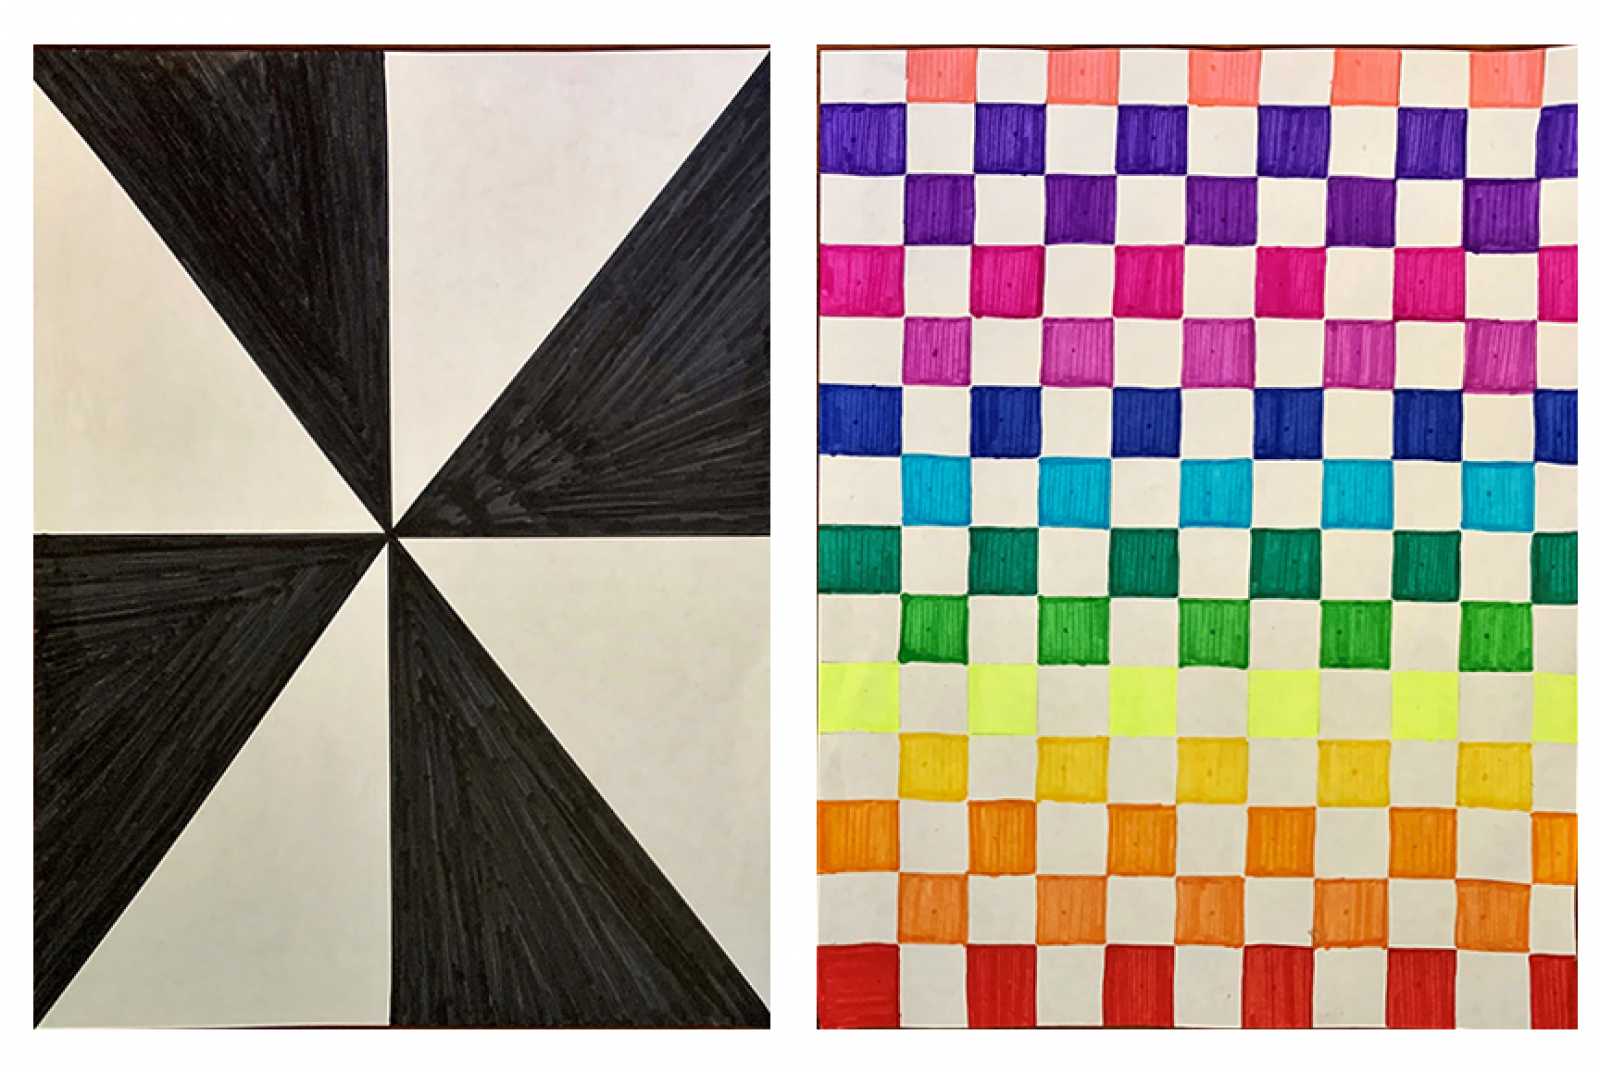
On new sheets of paper, sketch out two different designs. Be sure to add color!
You might consider exploring a theme with similar or contrasting images, such as opposite seasons (summer and winter) or different shapes (geometric and organic).
Step 4
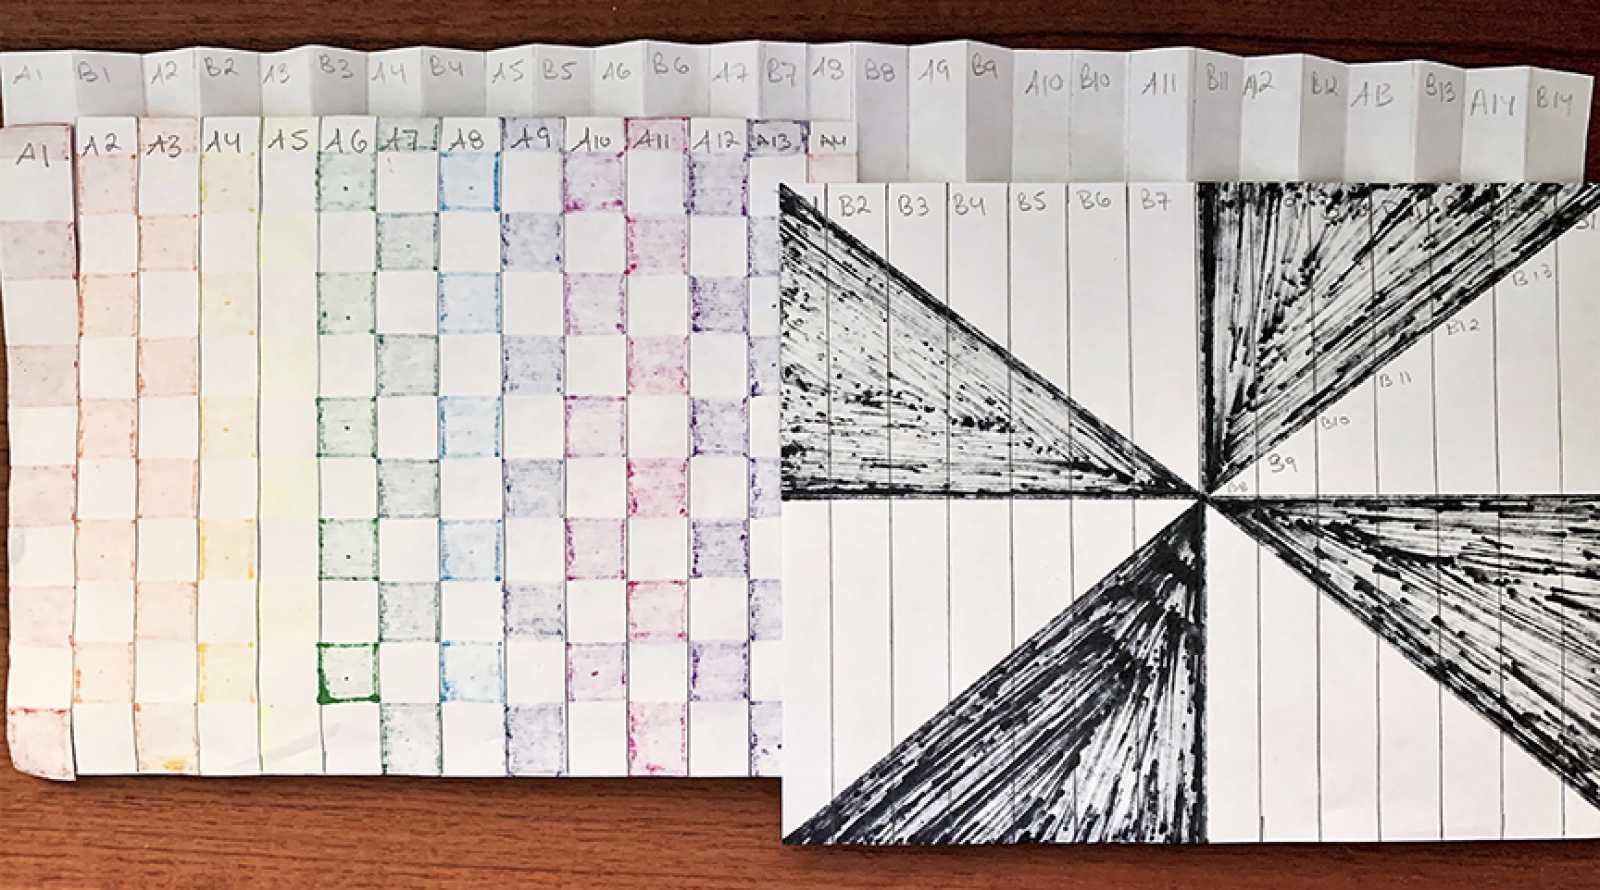
Once you have completed your drawings, measure and mark on the backside using the same width as your lager folded paper.
Tip: Rather than re-measuring, you can align your drawings to the creases of your folded paper, mark the top and bottom with a pencil, and then use a ruler to connect the lines.
On the back of each drawing, label the sections between the folds in order: A1, A2, A3, etc. for one, and B1, B2, B3, etc. for the other.
Repeat the same sequences on the front of the folded sheets of paper alternating folds with the corresponding numbers. Use A sequence for the left sides of the folds, and B sequence for the right sides of the folds.
Step 5
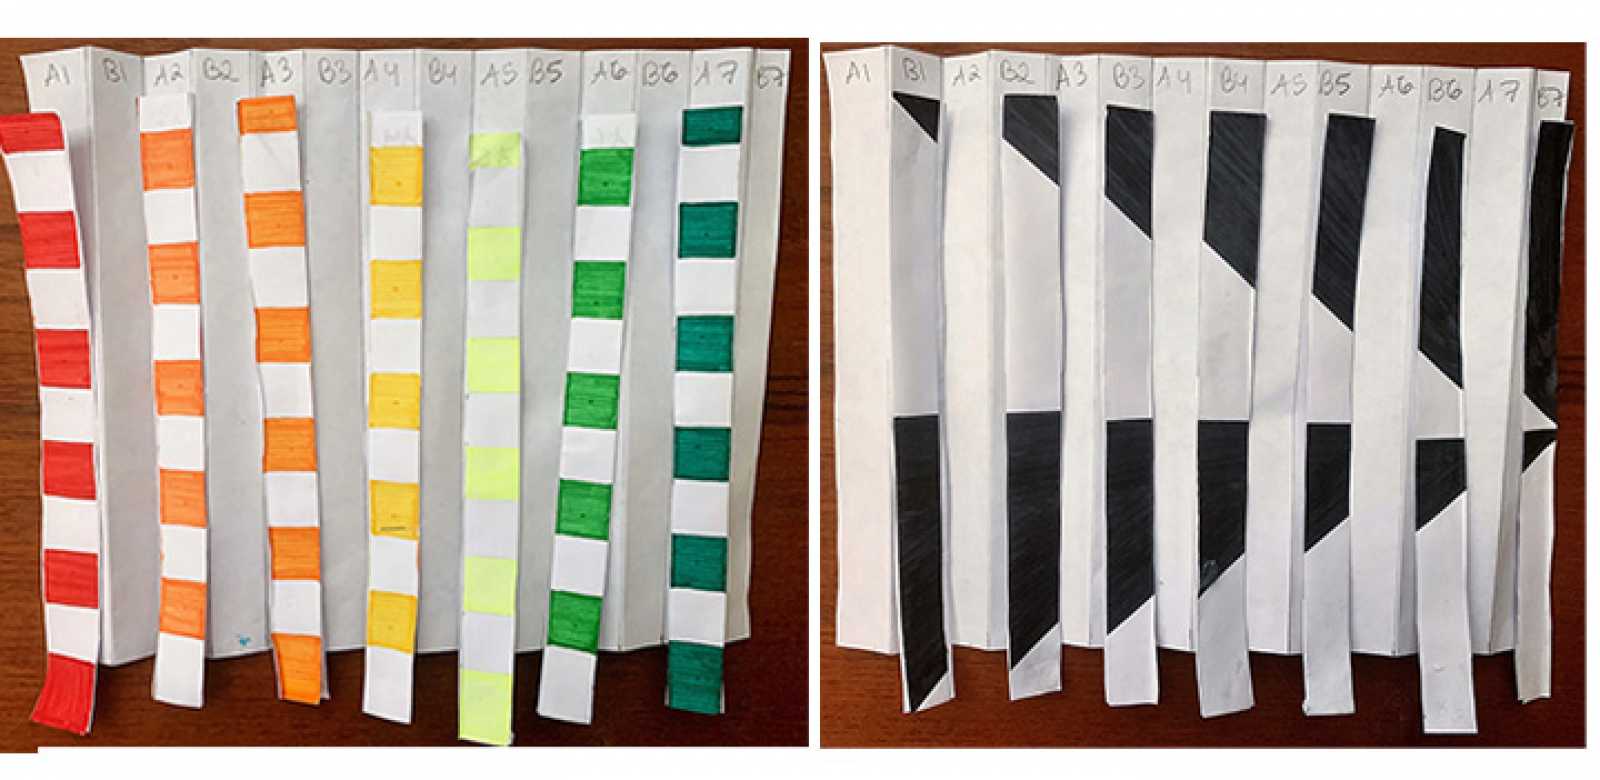
Carefully cut your first drawing into strips along the measured lines. As you do so, lay out the pieces right side up on your folded paper with the matching numbers. This will ensure that your drawing is in the correct order.
Glue your strips to the folded piece of paper. Repeat this process with your second drawing.
Tip: Once the glue has dried, you might need to re-fold the creases so that they are more pronounced.